Have you ever set a perfectly logical trade only to watch price just barely touch your stop-loss, then reverse sharply in your favor moments later?
You’re not alone. And no it’s not just bad luck or poor strategy.
What you’re seeing is institutional activity in action.
These big players often referred to as “smart money” don’t trade like retail traders. They place massive orders that can’t be filled all at once. Instead, they manipulate liquidity by triggering retail stop-losses and sweeping out weak positions. Once those levels are cleared, the market has room to move and that’s when price takes off.
This is why it feels like the market is hunting your stops.
Because it is.
But here’s the good news:
Once you learn how to identify the footprints smart money leaves behind, you can stop being the target and start trading with them.
In this article, you’ll learn a simple yet powerful Order Block Forex strategy that mirrors how institutional traders operate. We’ll break down the concept step by step, show you how to spot high probability order blocks, and give you a free MT4/MT5 indicator to automate your charting.
If you’re tired of second guessing entries and want to trade where the real money flows this guide is for you. Let’s dive in.
Table of Contents
What Are Order Blocks in Forex? (Smart Money Concept)
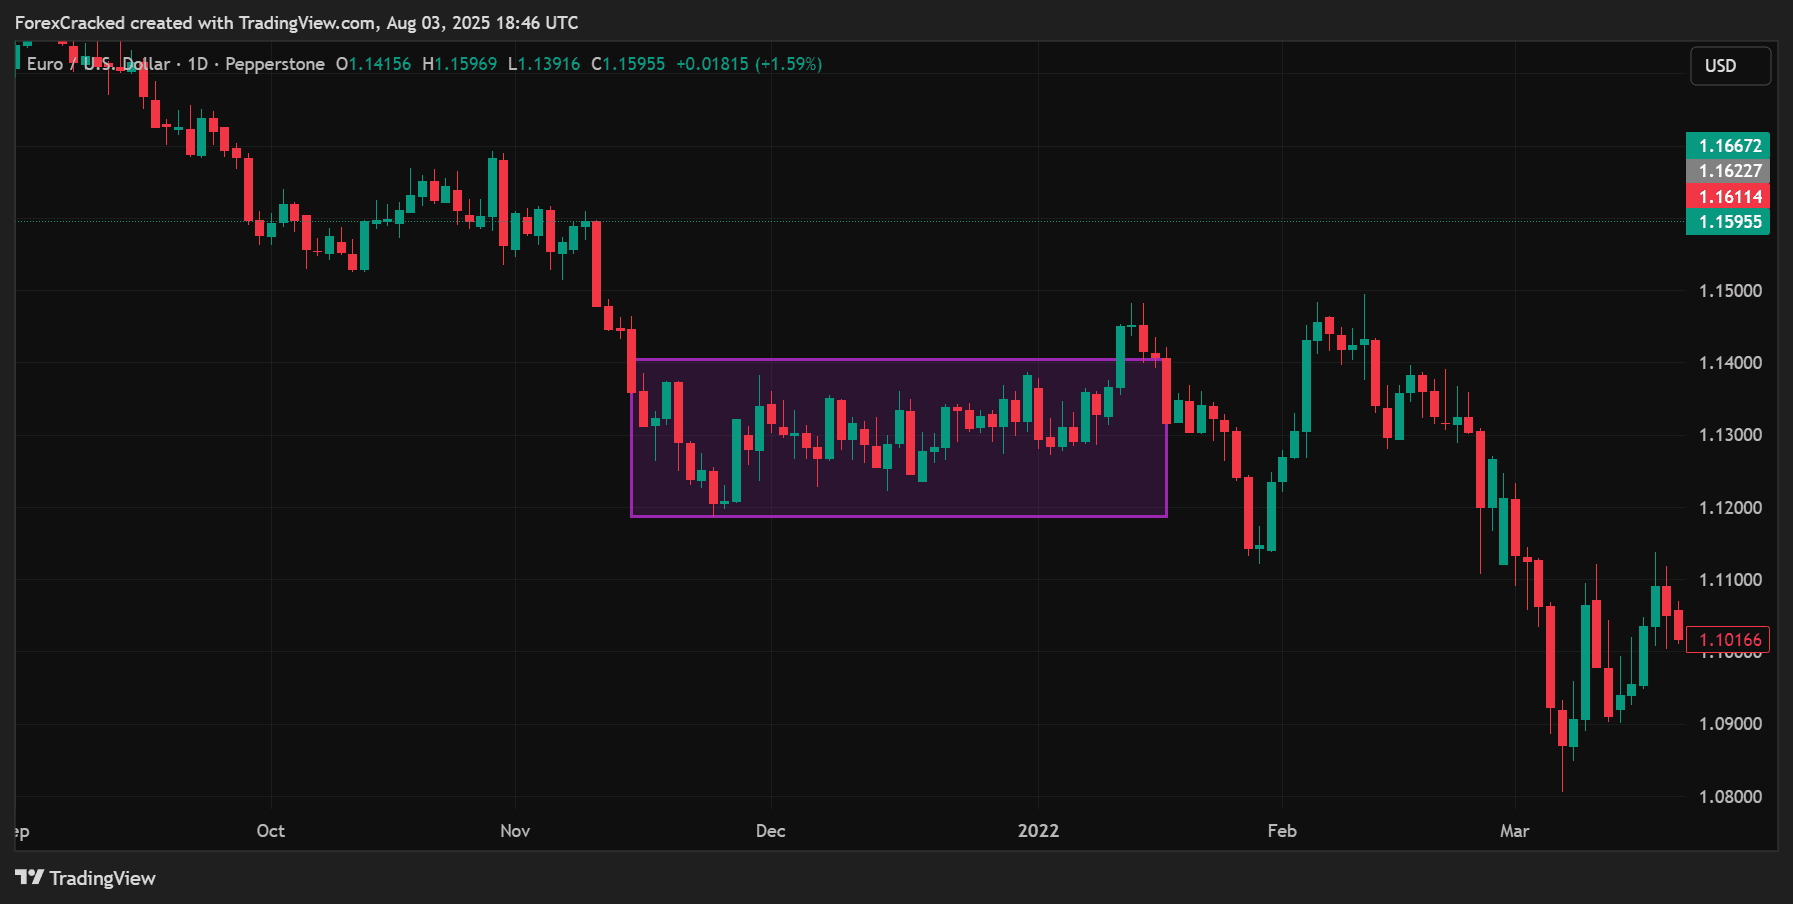
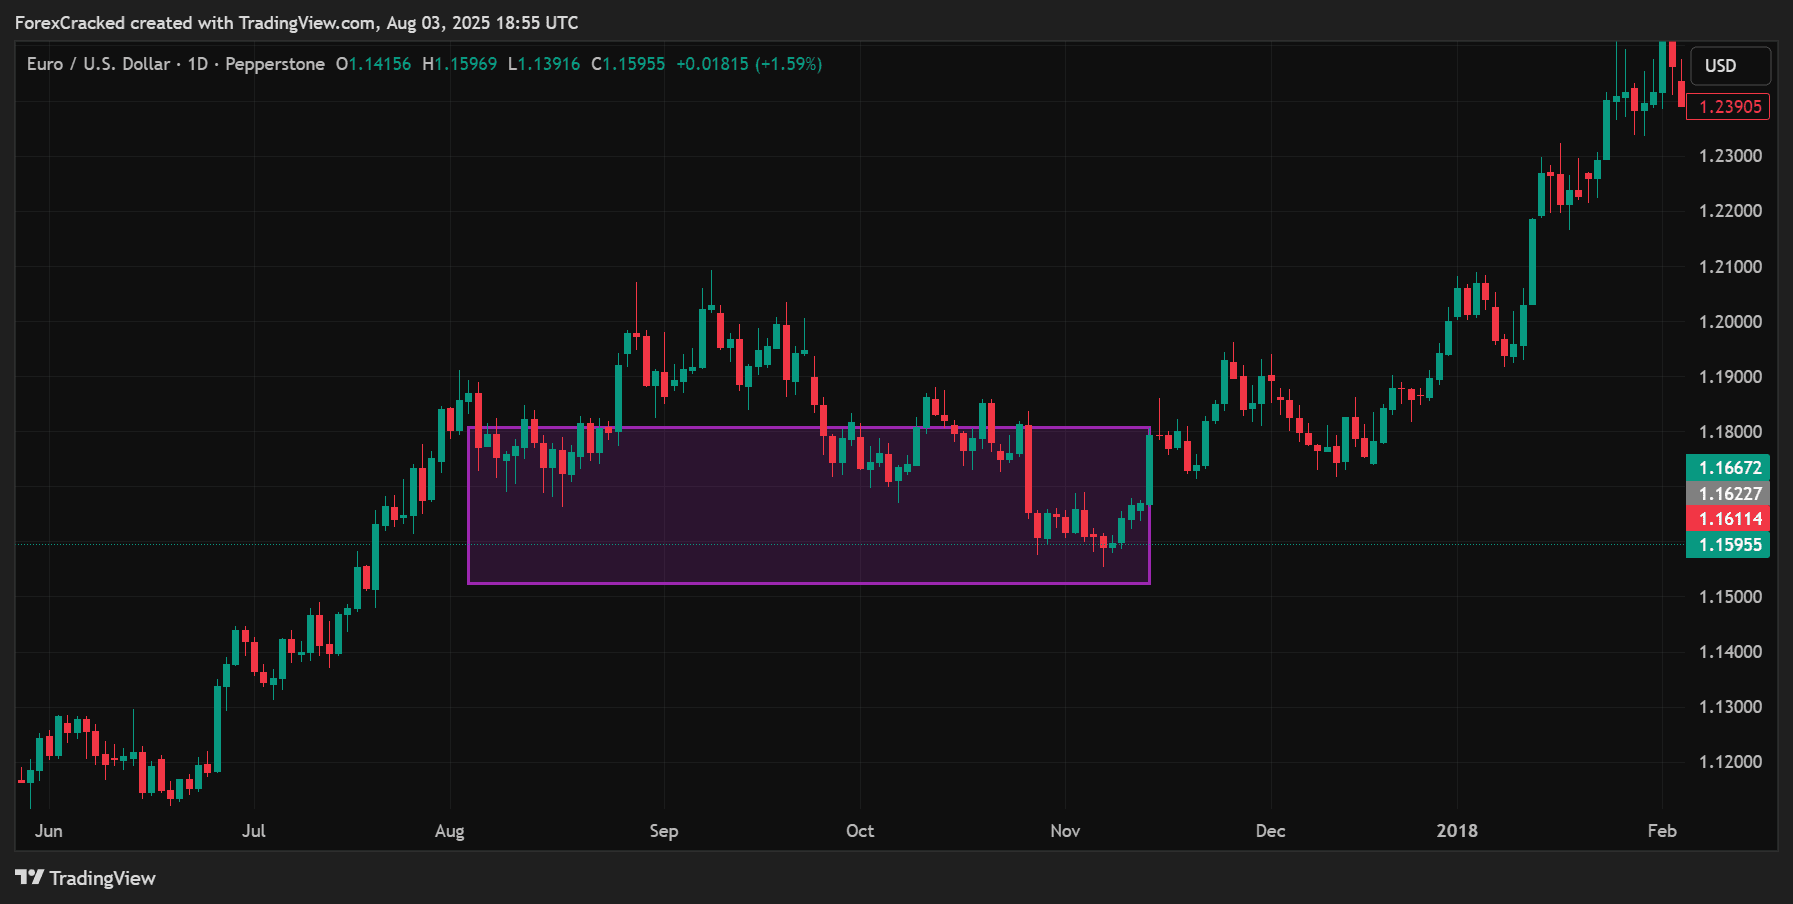
Order blocks are key price zones on your chart where institutional traders like banks and hedge funds place large buy or sell orders.
But here’s the catch: these large players don’t place their full position all at once. Doing so would move the market too much and cause slippage against themselves.
Instead, they break their trades into smaller chunks and fill them across a zone. These zones, often formed before big moves in the market, are called order blocks.
When price revisits these areas later, it often pauses, reverses, or explodes in the same direction because there are still unfilled institutional orders sitting there.
Understanding order blocks helps you recognize where smart money is likely to enter or defend a position giving you a huge edge over the average retail trader.
How Do You Identify a Valid Order Block? (Key Characteristics)
Not all order blocks are equal. High quality ones follow a distinct pattern.
Here are the 3 essential traits to look for:
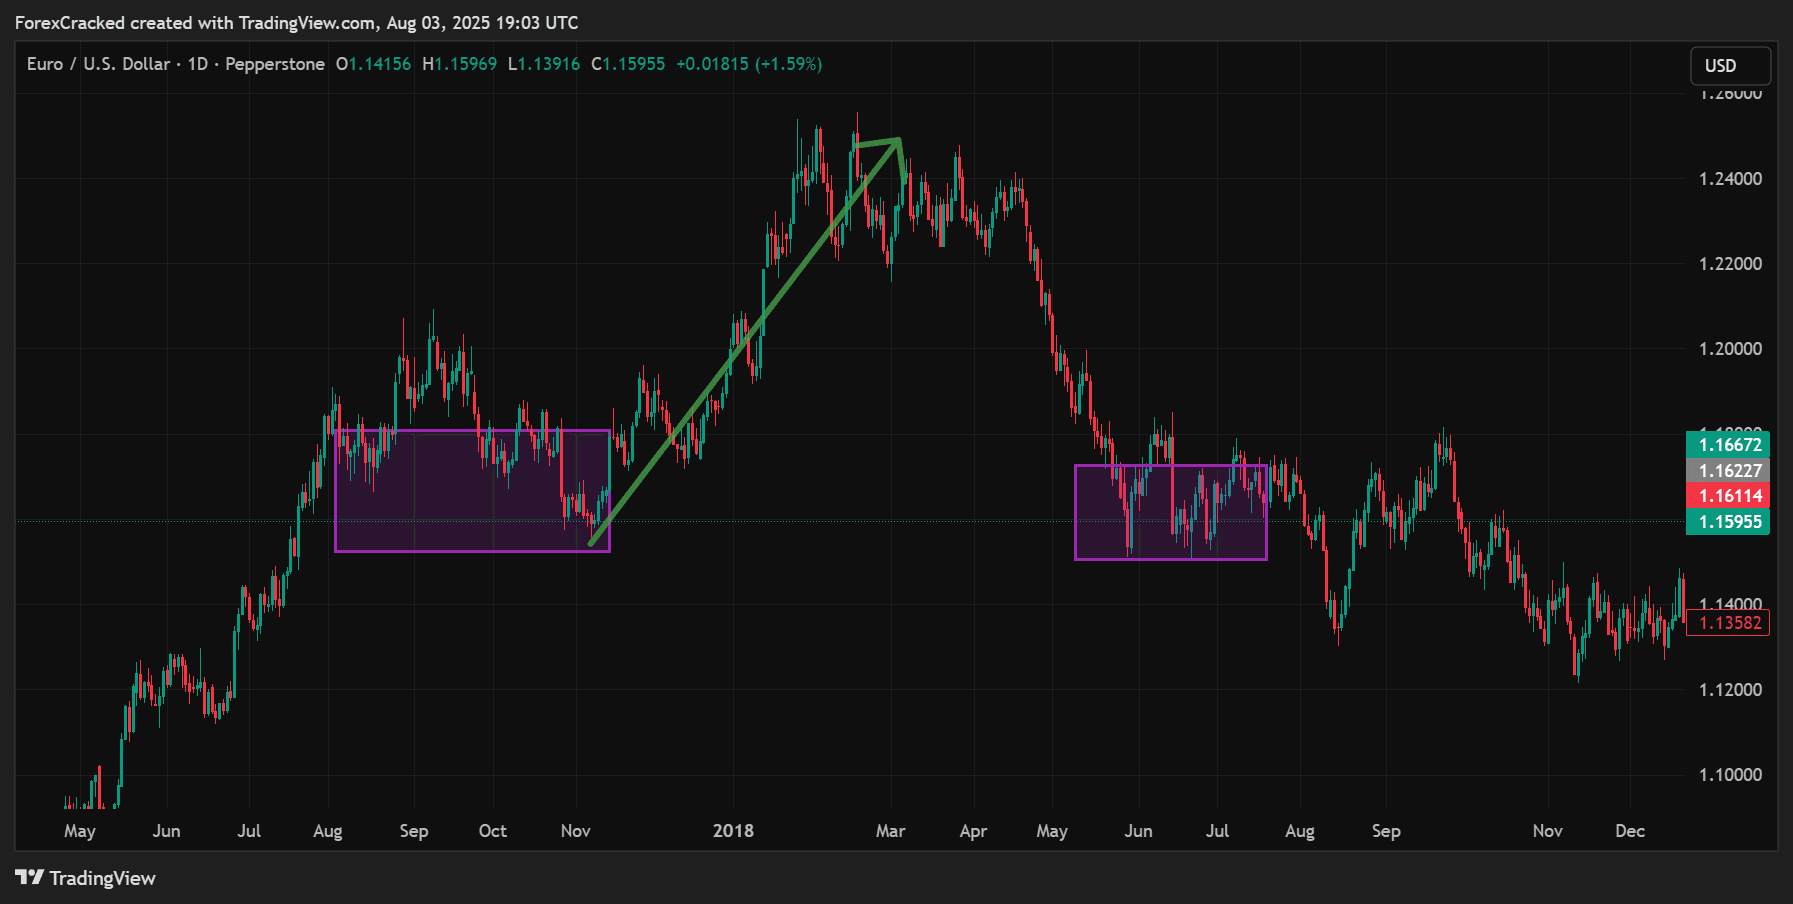
1. Liquidity Sweep Happens First (Stop Hunt Pattern)
Before a valid order block forms, price usually takes out nearby highs or lows triggering stop-losses of retail traders.
This “stop hunt” clears the path for institutional orders to be placed efficiently.
Example: In an uptrend, price may first dip below a recent swing low to trigger sell stops then reverse and shoot upward.
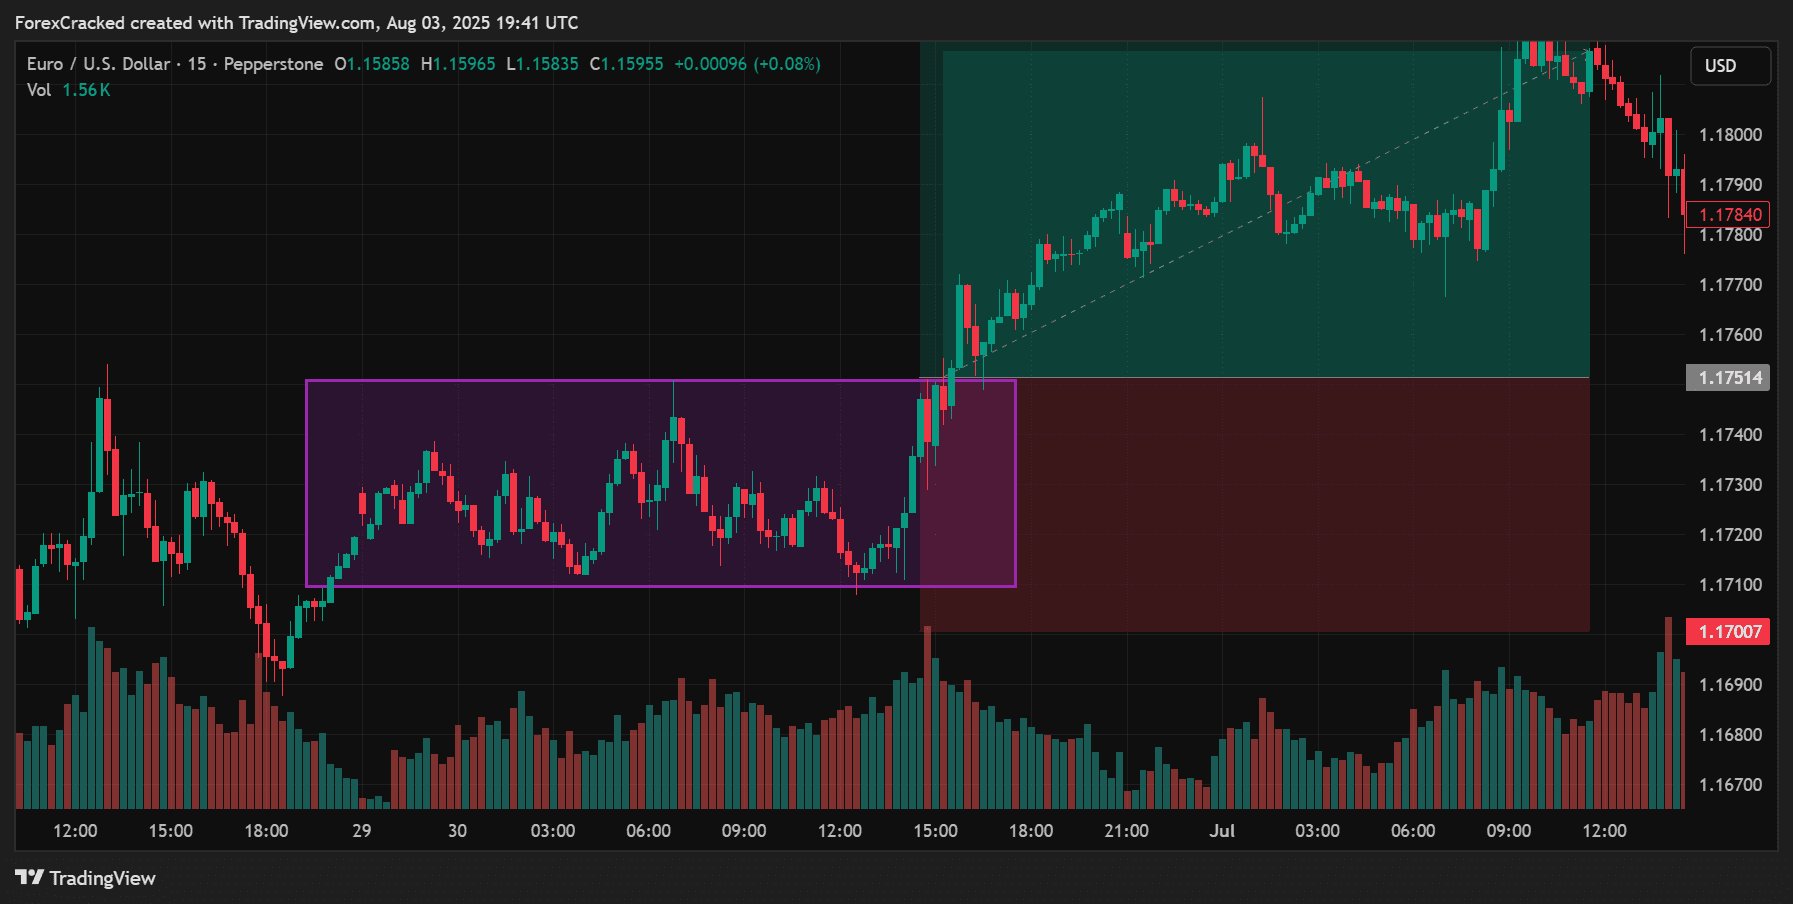
2. Strong One-Sided Move Follows (Imbalance or Fair Value Gap)

Once stops are cleared, the market often moves aggressively in one direction.
This leaves behind a price imbalance (also called a Fair Value Gap or FVG), which shows a lack of trading activity in that zone.
Why it matters: Smart money prefers to enter when the path is clear and these strong pushes leave clues.
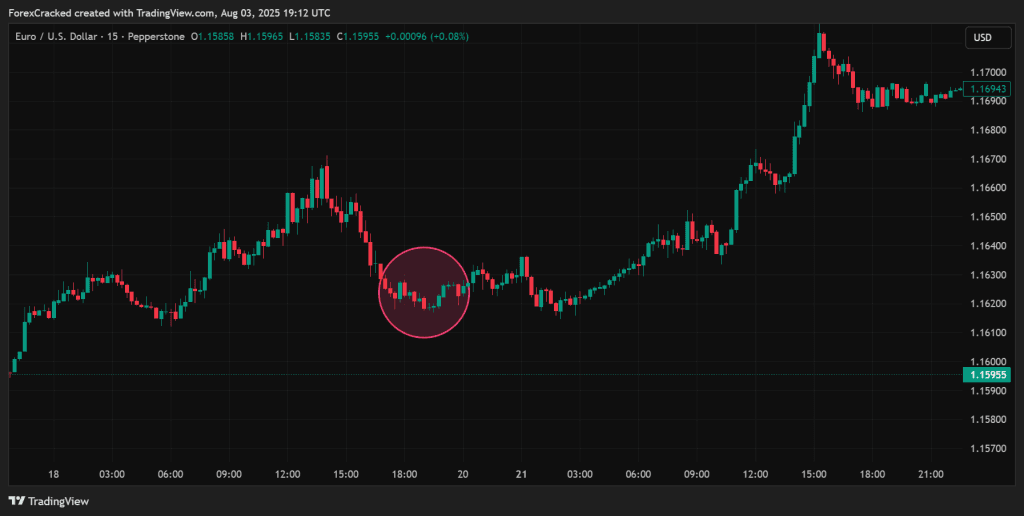
3. First Pullback Reacts at the Candle’s Open or Midpoint (Equilibrium)
When price revisits the order block for the first time, it tends to respect the open or 50 % level of the original order block candle.
These areas represent the core of where institutional activity happened making them ideal entry points for traders who know what to look for.
Why Order Blocks Are So Powerful in Forex Trading
- They reflect real institutional intent not just retail patterns.
- They offer precision entries with small stop-losses.
- They often become key support/resistance zones even across multiple timeframes.
- They can be combined with other tools like market structure and liquidity zones for maximum edge.
When you learn how to spot these areas and use them correctly, you’re no longer guessing where price might go you’re aligning your trades with the footsteps of the most powerful players in the market.
The Order Block Strategy: A Step-by-Step Smart Money Blueprint
The Strategy is a practical, rule based approach to trading order blocks.
It’s designed to help you stop chasing price and start anticipating high probability institutional moves with confidence.
This 5 step blueprint gives you a repeatable process for identifying, validating, and trading order blocks like a professional no guesswork, no indicators required (though we’ll use one later as a bonus filter).
Pro Tip: 70% of your trading edge comes from manual analysis understanding structure, price action, and smart money behavior. Indicators should support, not replace, this.
Step 1: Frame the Market Direction (Higher Timeframe Context)

Before you even think about entries, you need to understand where the market is headed overall.
This higher timeframe structure helps you avoid trading against the trend and filters out weak setups.
What to Do:
- Use the H4 chart (4 hour timeframe) to map the current market structure.
- Identify the latest Break of Structure (BOS) or Change of Character (CHOCH).
- BOS = continuation trend.
- CHOCH = potential reversal zone.
- Once your bias is set (bullish or bearish), only take entries in the same direction.
Think of H4 as your compass it keeps your lower timeframe trades aligned with the bigger market movement.
Step 2: Identify a Valid Order Block Manually
Now it’s time to zoom into the M15 or M30 chart and find the actual order block you want to trade.
Steps to Spot a Quality Order Block:
- Locate the origin candle just before a strong, impulsive move:
- For bullish setups → the last down candle before a breakout.
- For bearish setups → the last up candle before a breakdown.
- Check for a liquidity grab:
- Did the wick sweep recent swing highs or lows?
- This signals a stop hunt a classic smart money move.
- Confirm an imbalance (Fair Value Gap):
- A strong one sided move with little to no overlap between candles.
- Shows urgency from institutional traders.
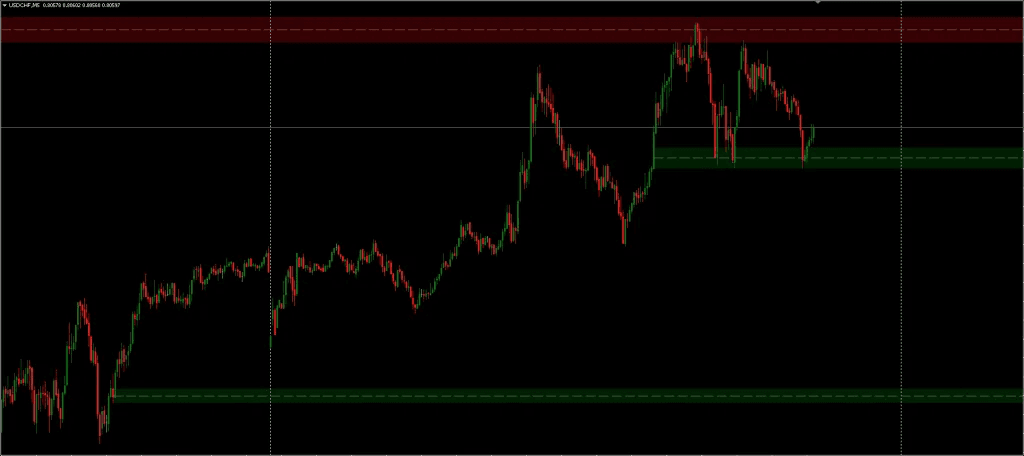
How to Draw Your Order Block Zone:
- In an uptrend: draw from low to 50% of the candle.
- In a downtrend: draw from 50% to high of the candle.
The midpoint (equilibrium) is often the highest probability entry level.
Step 3: Filter Setups with Smart Confluences

Order blocks are powerful but not all are created equal.
To trade only the highest probability zones, apply these 3 confluence filters:
1. Volume Spike Confirmation
Look for a surge in volume during the impulsive move away from the order block.
This indicates strong institutional participation, not just retail momentum.
2. Session Timing Matters
Order blocks tend to work best during high liquidity sessions, especially:
- London Open
- New York Open
- NY–London Overlap
Avoid taking OB trades during Asian session unless it’s part of a continuation.
3. Target the Right Liquidity (Liquidity Magnet)
Plan your exit at logical liquidity zones:
- Equal highs/lows
- Daily open
- Opposing order blocks
This keeps your trades grounded in realistic market targets.
Step 4: Set Entries, Stops, and Risk Like a Pro
Once your block and confluences are confirmed, follow these precise rules for entering and managing your trade.
| Parameter | Guideline |
|---|---|
| Entry Type | Use a limit order at the OB open or 50% level. Optional: wait for M5 pin bar or engulfing confirmation. |
| Stop-Loss | Place SL 5–10 pips (or 10% of ATR) beyond the opposite end of the OB. |
| Take-Profit | Target at least 2× risk (2 R). Consider scaling out: 50% at 1 R, rest at HTF liquidity. |
| Risk Per Trade | Use 0.5% to 1% of your account per trade. Never use martingale or overleverage. |
The goal isn’t to win every trade it’s to win bigger than you lose, consistently.
Step 5: Manage the Trade and Track Your Performance

Execution is just half the battle trade management and review is where growth happens.
What to Do During the Trade:
- Watch for mitigation: If price fully closes through your OB zone, it’s invalidated. Exit remaining positions.
- Stay emotion free: Don’t move stops unless partials have been secured. Stick to your rules.
What to Log in Your Journal:
- HTF bias (bullish/bearish)
- Screenshot of OB and confluence setup
- Grade your OB: A (perfect), B (minor flaws), C (questionable)
- Entry method used (limit/confirmation)
- News events?
- Result in R-multiples (e.g. +2.5 R, -1 R)
Weekly Review System:
- Every weekend, export screenshots and trade stats.
- Review win-rate, average R, and expectancy.
- Identify what’s working and what needs tweaking.
Pro traders don’t just trade better they review better.


Bonus Tool: Free Order Blocks Indicator for MT4/MT5 (How to Use It the Right Way)

While the strategy can be executed 100% manually, adding the Order Blocks Indicator gives you a major advantage especially when it comes to speed, precision, and efficiency.
This free indicator for MT4 and MT5 automatically detects institutional order blocks on your chart, highlights high-probability zones, and even sends you alerts when price returns to those areas.
But remember: this is a tool to support your analysis, not replace it.
Think of it as your assistant, not your decision-maker.
Key Features That Make This Indicator Powerful
Let’s walk through the most valuable features of the Order Blocks Indicator and how to make the most of each one:
Volume-Based Detection (Smart-Money Focused)
The indicator uses volume spikes and price behavior to identify order blocks where institutional traders are most likely active.
This means you’re not just looking at random support and resistance zones you’re tracking real market intent.
Just load it on your chart, and it will automatically highlight both bullish and bearish order blocks based on volume and structure.
Best of all? It works straight out of the box with the default settings.
Auto-Hides Mitigated Zones (Cleaner Chart, Less Confusion)
One of the most helpful features is the ability to auto remove order blocks that have already been used (i.e. mitigated).
This keeps your charts clean and focused only on fresh zones that are still relevant.
You can choose whether an order block is considered “used” after:
- A wick touches the zone (more aggressive, great for scalping)
- Or a full candle closes through it (more conservative for swing traders)
For intraday setups, use the “Mitigation = Wick” setting for faster signals.
Control How Many Zones Appear (Bullish/Bearish OB Limits)
If your chart is cluttered with too many boxes, it can slow down your decision-making.
This indicator lets you limit the number of bullish and bearish order blocks shown at any time, so you only see the most recent, high priority zones.
A good starting point is to cap each type at 3 zones per chart. This keeps your workspace clean and helps you focus on quality over quantity.
Smart Alerts to Save You Screen Time
You don’t have to stare at the charts all day.
The indicator offers built-in alerts via popup, email, or even SMS so when price re-enters a valid order block, you’ll get notified instantly.
This is incredibly useful if you’re monitoring multiple currency pairs or trading part-time.
Set the alert system to “On” and customize the notification type that suits your workflow best.
Best Timeframes for Reliable Signals
Although the indicator works on any timeframe, it performs best on:
- M5 (5-minute)
- M15 (15-minute)
- M30 (30-minute)
These intraday windows align perfectly with the strategy, giving you sharper setups and more frequent trading opportunities.
How to Use the Indicator in Your Trading Workflow
Here’s a simple, repeatable process to integrate the Order Blocks Indicator into your strategy:
- Start with Higher Timeframe Analysis (H4):
Determine the overall market direction using the manual method explained in Step 1 of this guide. - Load the Indicator on Intraday Charts (M5–M30):
Let it automatically mark order blocks based on real-time volume and structure. - Wait for Alerts:
Once price approaches a highlighted order block, the indicator will notify you. - Validate the Zone Using Confluence Filters:
Don’t trade blindly check for volume spikes, liquidity sweeps, and session timing. Use the filters outlined in Step 3 of the strategy. - Place Your Entry and Manage the Trade:
Set your limit order, apply correct stop-loss and take-profit levels, and manage the trade using the rules in Step 4.
The goal isn’t to rely on the indicator, it’s to enhance your timing, reduce clutter, and catch institutional zones faster.
Why This Indicator Works Best as a Support Tool (Not a Shortcut)
Many traders fall into the trap of letting indicators decide everything. That’s a mistake especially with institutional-style strategies.
Here’s how to use this tool correctly:
- Don’t trade every block that appears.
- Use it to spot potential zones faster, but always run your manual validation checklist before entering.
- Combine it with higher timeframe bias and liquidity targeting for optimal results.
When used the right way, the Order Blocks Indicator becomes a precision tool in your smart money toolkit helping you save time, improve accuracy, and trade with more confidence.
Frequently Asked Questions
Q1. Is the indicator repainting?
No. Blocks are fixed once printed; only “mitigated” zones disappear (you can disable auto hide).
Q2. Can I trade other assets?
Yes. currency pairs, gold, indices, crypto. Just adjust spread/volatility for stop size.
Q3. Do I need volume data?
The indicator estimates volume from broker feed, but institutional volume (futures) improves accuracy.
Q4. How many winning trades can I expect?
Backtests over 200 setups on EURUSD M15 averaged ~48 % win-rate but +1.7 R expectancy. Real results depend on discipline.
Final Thoughts: Mastering Order Blocks with Strategy + Tools
If you’ve made it this far, you now have a complete, high-probability framework to trade like the institutions not against them.
Here’s the most important lesson:
Your edge is in understanding smart money behavior, not blindly following indicators.
Use the strategy first. The Order Blocks Indicator is just a support tool to help you act faster and cleaner not a shortcut.
Focus on quality setups over quantity. One solid, well-validated order block per session is more powerful than chasing every bounce or break. With proper confluence and structure, even a 40% win rate at 2R+ reward will keep your equityclass="fc-gloss-tip" data-slug="equity-curve" tabindex="0">equity curve rising.
Consistency beats excitement. Discipline beats luck.
Before You Go Live Here’s Your Practice Plan:
- Download the Order Blocks Indicator (Free) from ForexCracked and install it on MT4 or MT5.
- Start with a demo account. Mark HTF bias, confirm order blocks, and trade only when all confluences align.
- Log at least 50 trades using the checklist. Grade each setup, track R-multiples, and review your trades weekly.
- Move to micro-lots only after your demo equity curve rises steadily for at least three consecutive weeks. Scale gradually never rush.
Once you build confidence, understanding, and control, you’ll no longer feel like the market is hunting you.
Instead, you’ll be hunting with it using the same tools, tactics, and psychology as the smart money.
Trade with purpose.
Trade with precision.
Trade like the pros.
See you on the charts and happy trading.